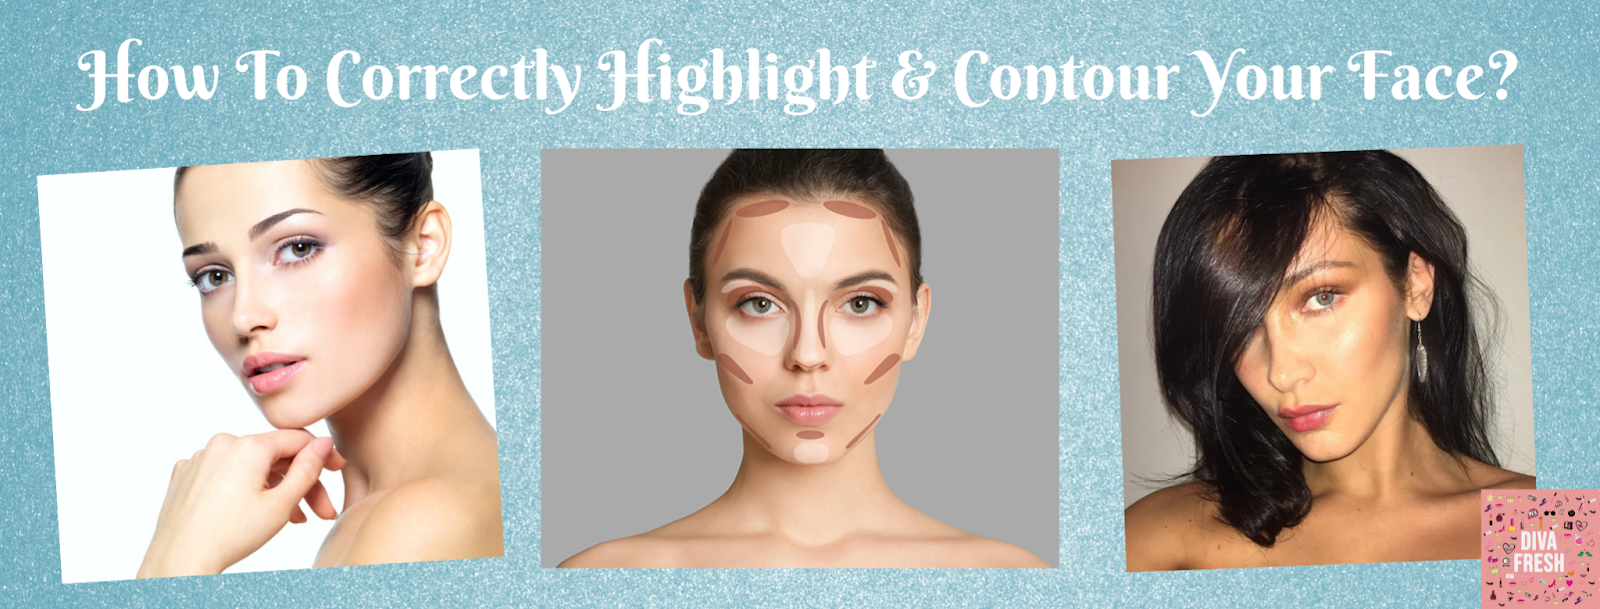
Highlight and contour have consistently been cornerstones of makeup application. But, in present times, these two makeup techniques have gone from one extreme to extreme; highlights are blinding” and contours are sharp. In case you’re simply getting into highlight and contour life, here are some tips and tricks you should know!
Avoiding the white-cast
Highlight can either make your sparkling and face sculpted, or it can make you stripy and textured. When you gaze directly into the mirror, turn your head a little, and see a grayish-white streak where your highlighter must be applied, it is very light and heavily applied.
Start by getting a highlighter that either coordinates or is slightly lighter than your skin tone. For instance, tan skin looks great with a gold or champagne highlighter instead of a pearly silver.
At that point, apply a light layer, mix, then again step back and look. Try to avoid enhancing texture by pressing powder highlighter into the skin with your fingers after applying with a brush. This prevents the powder from sitting on small hairs or pores and absorbs it into the skin.
Contouring the bridge of the nose and not the tip

A heavy amount of the highlighter on the tip of the nose isn’t complimenting. To shape the face and add dimension, dust the highlighter along the bridge of the nose.
To additionally shape the nose, take a small shadow brush and buff a little contour along each side of the edge. Make sure that there are no visible lines, and mix with a brush.
Decide on a cool contour… yet don’t go gray
Utilizing a straight-up bronzer as a contour will not generally give you the outcome you’re searching for. Indeed, it can add warmth and dimension, yet it will not give that chiseled impact. Keep in mind, bronzer adds warmth like the sun (think a solid tan), while contour adds cool depth, similar to a shadow.
Get a contour on the cooler side, yet with enough warmth to hold it back from being ashy, gray, or spooky.
Keep away from the daytime texture by utilizing a creamier highlighter
Extremely shimmery, powder highlights are made to draw light and attention right after their application. That’s why any texture will be highlighted. While a light hand and good blending can reduce it, occasionally it’s unavoidable. To solve this matter, a smooth, balmy highlighter is recommended, as long as the glitter is a no-show and the shimmers are very subtle.
With creams, gels, and balms, the highlighter comes with various textures. Furthermore, the emollient textures float over the skin, decorating and smoothing it.
Try not to bring your contour too low (or too high)

It requires a little practice to find out the correct contour placement for your face. Study your face in the mirror and with various lighting. Watch where the shadows normally fall and where the light normally hits. This will assist you with discovering where to put your chiseling items.
While contouring the cheekbones, begin with a narrow application simply under the bone (beginning from the hairline by the ear) and mix up from that point. Try not to blend in the downward direction as you risk dragging your face down and making a smudge rather than a shadow.
Tip: prior to washing your face by the day’s end, have a play around with bronzing and contouring items. Try different positions and contour the jaw, nose, cheeks, and forehead as an experiment. It doesn’t make any difference if you make it a mess as you’re already going to wash everything off!
